Friday, November 22, 2024

How to Build a Wooden Duck Boat: DIY Guide for Hunters

How to Build a Wooden Duck Boat: DIY Guide for Hunters

Building Your Own Wooden Duck Boat: A Hunter's Guide

Hey there, fellow duck hunters! Have you ever dreamt of gliding across the water in a boat you built yourself? It's not as hard as you might think. Building a wooden duck boat can be a rewarding experience, giving you a sense of accomplishment and a custom-made vessel tailored to your hunting needs. Let's dive into this exciting project together.

Step 1: Choosing Your Wood and Design

Before you start hammering and sawing, you need to pick the right materials and plan your design. This is the fun part where you get to personalize your boat.

Choosing the Right Wood

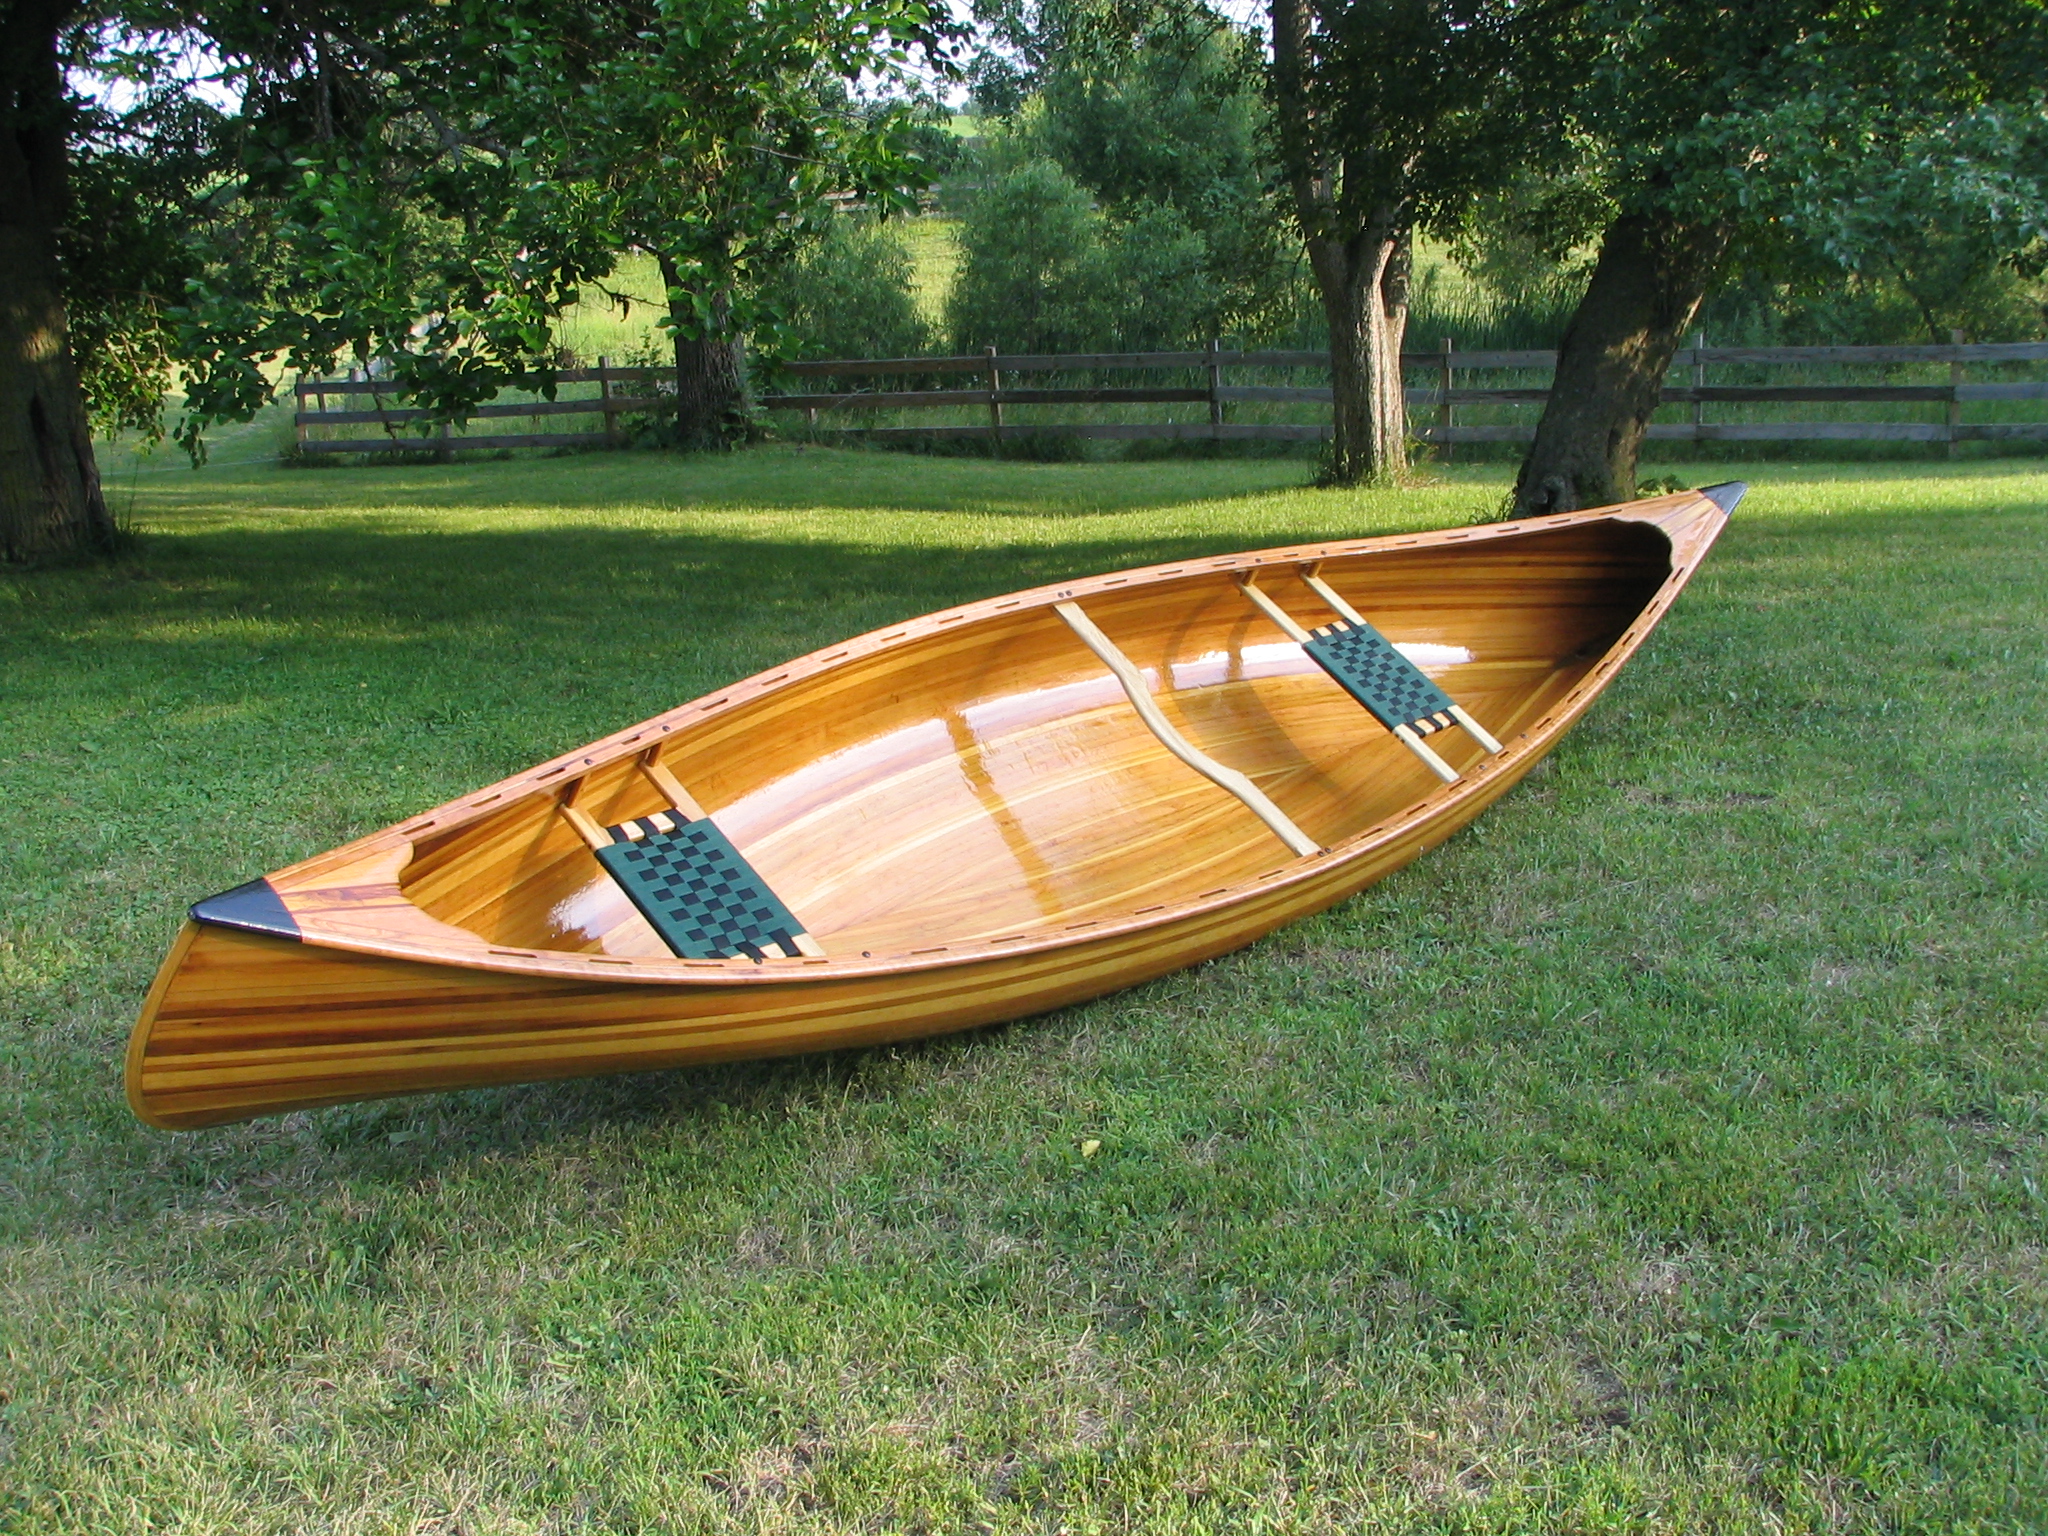
The classic choice for duck boats is marine-grade plywood. It's strong, durable, and resistant to water damage. You can also opt for cedar, which is lightweight and naturally rot-resistant. Some hunters prefer using mahogany for its beauty and durability, but it can be more expensive.
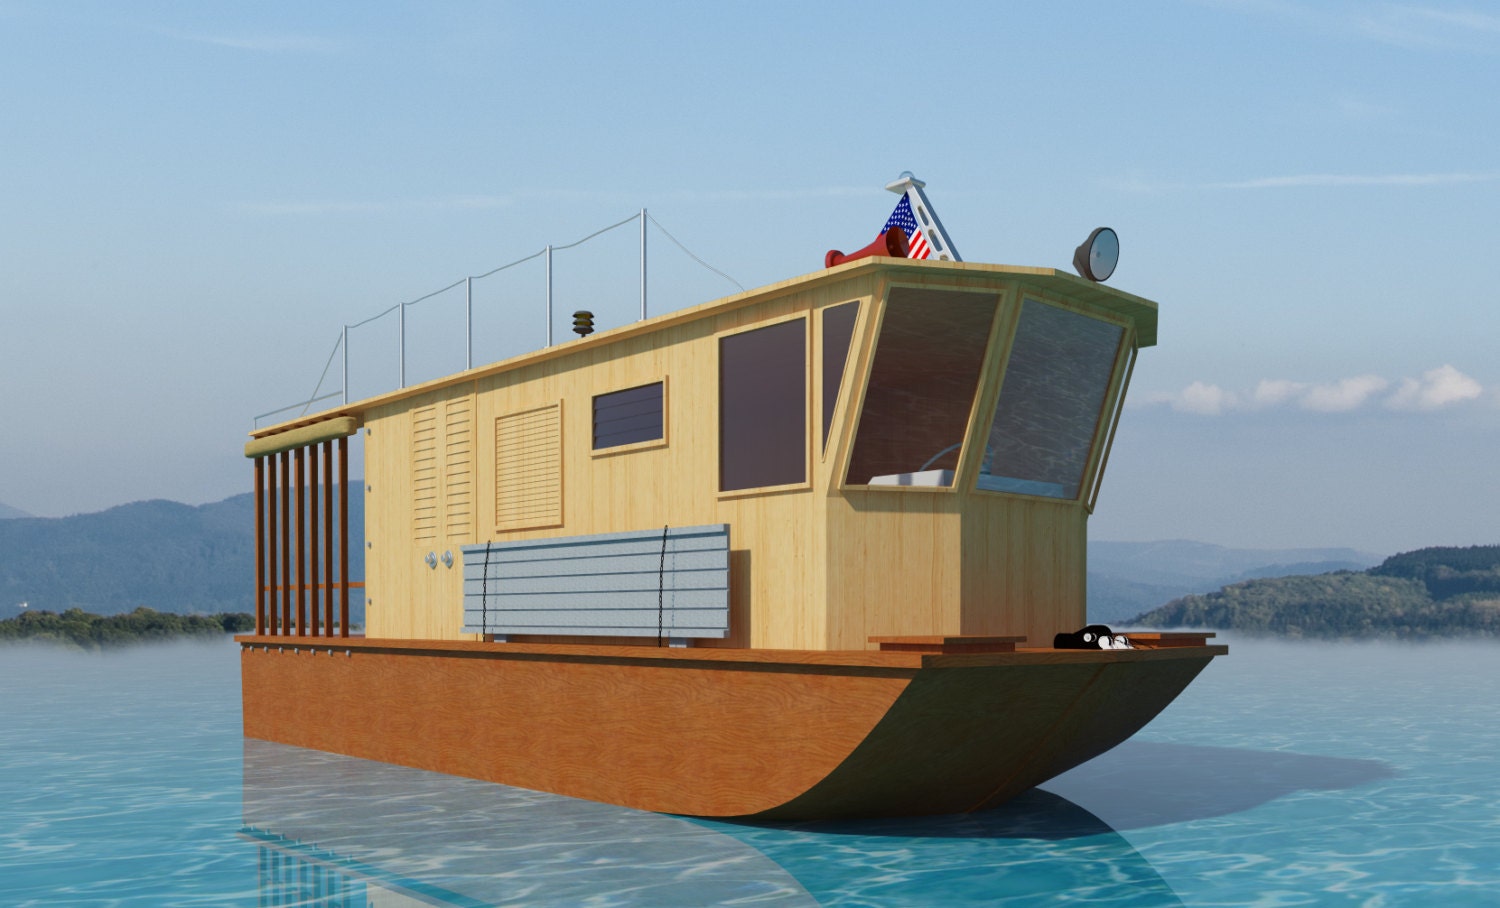
Designing Your Boat

There are endless possibilities for duck boat designs. You can find plans online or in books, or even create your own. Consider these factors:

  • Size: How many hunters and gear will you be carrying?
  • Shape: Do you want a wide, stable boat for rough waters, or a sleek, fast hull for open water?
  • Features: Think about built-in blinds, rod holders, and any other features that you need for your hunting style.

Step 2: Gathering Your Tools and Materials

Once you've got your plans and chosen your wood, it's time to gather the tools and materials. You'll need a good workshop space and some basic woodworking skills. Here's a list of essential tools:

  • Circular saw: For cutting the plywood into shape.
  • Jigsaw: For intricate cuts and curves.
  • Hand tools: Hammer, chisel, screwdriver, etc.
  • Sandpaper: To smooth out the wood.
  • Clamps: For holding pieces together while you work.
  • Wood glue: For bonding the wood pieces.
  • Marine-grade sealant: To protect the wood from water.
  • Paint or stain: For a durable finish.
  • Fasteners: Screws, nails, etc.

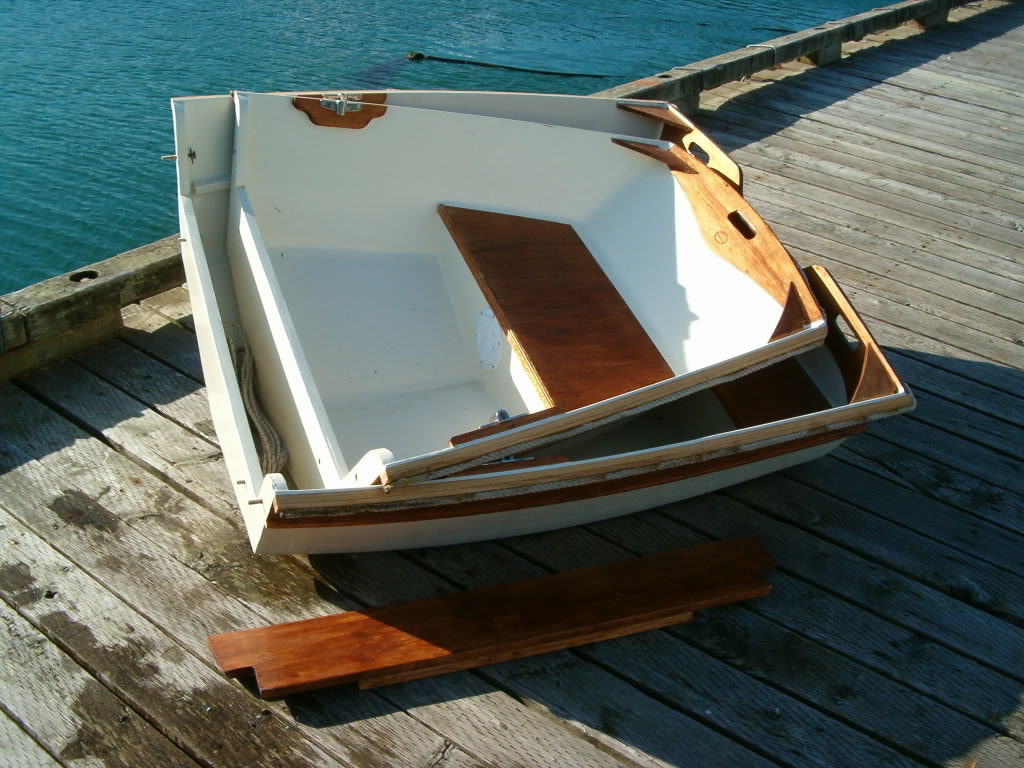
Step 3: Building the Hull

This is the core of your duck boat. Start by cutting the plywood sheets to the dimensions in your plans. Use the circular saw for straight cuts and the jigsaw for curved sections.

Now, you'll assemble the hull pieces using wood glue and screws or nails. Be sure to use a good quality wood glue for a strong bond, and secure the pieces with clamps until the glue dries.

Once the hull is assembled, carefully sand down any rough edges and imperfections. Make sure the surface is smooth and even.

Step 4: Adding the Deck and Seats

The deck provides a platform for you to stand or sit while hunting. Again, cut the plywood to the dimensions specified in your plans. Use wood glue and screws to attach the deck to the hull.

Next, build your seats. You can use marine-grade plywood or even comfortable cushions for your hunting comfort.

Step 5: Finishing Touches

Now it's time to add some finishing touches that will make your boat both functional and attractive.

Adding Features

Install any additional features like rod holders, gun racks, or built-in blinds. You can also add a small storage compartment for your gear.

Sealing and Painting

Apply a good quality marine-grade sealant to the entire boat to protect the wood from water damage. Let it dry completely before applying your chosen paint or stain. This step is crucial to ensure your boat lasts for years to come.

Step 6: Testing and Enjoying Your Duck Boat

After the paint dries, it's time for the exciting part: testing your boat! Launch it into a calm body of water and check for any leaks or issues. Make any necessary adjustments before taking it out on a hunting trip.

Congratulations! You've built your very own wooden duck boat. Now get out there and enjoy the fruits of your labor.

Commonly Asked Questions

Building your own boat can be a rewarding experience, but it also comes with questions. Here are some frequently asked questions about building a wooden duck boat:

How long does it take to build a wooden duck boat?

The time it takes to build a wooden duck boat depends on your experience level and the complexity of the design. A simple boat could take a few weeks to build, while a more complex design could take several months.

How much does it cost to build a wooden duck boat?

The cost of building a wooden duck boat depends on the type of wood, the features you include, and your own labor costs. You can expect to spend anywhere from a few hundred dollars to several thousand dollars. However, it's often cheaper than buying a pre-built boat.

Do I need any special skills to build a wooden duck boat?

While basic woodworking skills are helpful, you don't need to be a professional to build a wooden duck boat. You can learn as you go, and there are plenty of resources available to help you along the way.

What if I make a mistake during the building process?

Don't worry too much about mistakes. Everyone makes them. If you make a mistake, just fix it as best you can and keep going. The beauty of building your own boat is that you can always learn from your mistakes and improve your skills.

Remember, building a wooden duck boat is a journey, not a race. Take your time, enjoy the process, and don't be afraid to ask for help when you need it. Happy hunting!

How to Build a Wooden Dinghy: Easy and Affordable Plans

How to Build a Wooden Dinghy: Easy and Affordable Plans

Building a Wooden Dinghy: Easy and Affordable Plans

Embark on a rewarding journey into the world of boatbuilding with this comprehensive guide to constructing your own wooden dinghy. This project, designed for affordability and ease, will equip you with the skills and knowledge to create a beautiful and functional vessel, perfect for leisurely paddling or exploring tranquil waters.

Choosing the Right Dinghy Design

Before diving into the build, select a dinghy design that aligns with your skill level, desired size, and intended use. Several excellent free and affordable plans are available online, catering to various preferences.

Popular Dinghy Designs

  • The Simple Punt: A classic, flat-bottomed design, perfect for beginners. Its stability makes it ideal for fishing or leisurely paddling.
  • The Skiff: A versatile design with a slightly pointed bow and a shallow draft, suitable for exploring shallow waters and navigating small rivers.
  • The Dory: A traditional fishing boat with a wide, rounded hull, renowned for its seaworthiness and stability, even in choppy waters.

Gathering Materials and Tools

Once you have chosen a plan, gather the necessary materials and tools:

Wood

  • Marine Plywood: Use marine-grade plywood for the hull and deck, ensuring durability and resistance to moisture.
  • Cedar or Mahogany: These hardwoods are commonly used for the gunwales, ribs, and keel, offering strength and a beautiful aesthetic.
  • Oak: Ideal for the transom, providing strength and stability.

Hardware

  • Fasteners: Choose marine-grade screws and bolts for lasting strength and resistance to corrosion.
  • Oars and Oarlocks: Essential for rowing your dinghy.
  • Rowing Seat: Select a comfortable and sturdy seat.
  • Hardware for Rudder and Steering: Depending on your design, choose appropriate hardware for the rudder and steering system.

Tools

  • Hand Tools: Hammers, saws, chisels, planes, and screwdrivers are essential for basic woodworking tasks.
  • Power Tools: A drill, circular saw, jigsaw, and sander will make the build significantly easier and faster.
  • Measuring Tools: A tape measure, ruler, and protractor are essential for accurate measurements and cutting.
  • Clamps: Various sizes and types of clamps are crucial for holding pieces securely during assembly.

Building the Hull

Start by building the hull, the foundation of your dinghy. This involves constructing the frames, planking the hull, and adding the keel.

Constructing the Frames

  • Cut the Ribs: Using the plan as a guide, cut the ribs (also known as frames) from your chosen hardwood to the specified dimensions.
  • Shape the Ribs: Shape the ribs using a plane or sander to achieve the desired curve and fit them snugly against the molds or templates provided in your plan.
  • Assemble the Frames: Securely attach the ribs to the keel using screws or bolts, ensuring they are spaced correctly.

Planking the Hull

  • Cut the Planks: Cut the marine plywood planks to the specified length and width, making sure they are slightly wider than the hull's width.
  • Fit the Planks: Carefully fit the planks to the frames, starting from the keel. Use clamps to hold the planks in place.
  • Attach the Planks: Secure the planks to the frames and keel with marine-grade screws or bolts, ensuring they are countersunk to avoid protruding into the hull's interior.

Adding the Keel

  • Cut the Keel: Cut the keel from oak to the specified length and shape, using a saw and plane or sander.
  • Attach the Keel: Secure the keel to the bottom of the hull using marine-grade screws or bolts, making sure it is aligned correctly.

Constructing the Deck and Finishing Touches

Once the hull is complete, build the deck and add the final touches:

Building the Deck

  • Cut the Deck Planks: Cut the marine plywood planks for the deck to the specified dimensions.
  • Fit the Deck Planks: Fit the deck planks to the hull, ensuring they are level and flush with the gunwales.
  • Attach the Deck Planks: Secure the deck planks to the hull and frames using marine-grade screws or bolts.
  • Install the Gunwales: Attach the gunwales to the hull and deck, using clamps and fasteners.

Adding Finishing Touches

  • Install Oarlocks: Attach the oarlocks to the gunwales, ensuring they are securely mounted.
  • Install the Seat: Secure the rowing seat to the deck, making sure it is positioned comfortably.
  • Install the Rudder and Steering System: If your design includes a rudder and steering system, install them according to the plan's instructions.
  • Sand and Finish: Sand the entire dinghy smooth and apply a marine-grade varnish or paint to protect the wood and enhance its appearance.

Launching Your Dinghy

Once the construction is complete, launch your dinghy and enjoy the fruits of your labor. Test the boat in calm waters, ensuring everything is securely attached and functioning correctly. Celebrate your achievement and embark on thrilling adventures in your handcrafted wooden dinghy!

Safety First

While building a dinghy can be a rewarding experience, safety should always be a priority. Always follow the plans carefully, use proper tools and techniques, and wear appropriate safety gear when working with wood and power tools.

Conclusion

Building a wooden dinghy is a fulfilling project that combines woodworking skills with the thrill of creating a beautiful and functional vessel. By following these steps and choosing a plan that suits your abilities, you can embark on a journey of craftsmanship and enjoy the unique pleasure of sailing in a boat you built yourself.

Houseboat Plans for Creating a Compact, Sturdy Floating Home

Houseboat Plans for Creating a Compact, Sturdy Floating Home

Houseboat Plans for a Compact, Sturdy Floating Home

Dreaming of a life on the water? A houseboat offers a unique and liberating lifestyle, allowing you to explore waterways, enjoy breathtaking views, and wake up to the gentle rocking of the waves. But before you set sail on your aquatic adventure, careful planning is crucial. Creating a compact and sturdy floating home requires meticulous attention to detail, from the hull design to the interior layout. This guide will walk you through the essential elements of houseboat plans for a cozy and durable sanctuary on the water.

Choosing the Right Hull Design

The foundation of your houseboat is the hull, which determines its stability, buoyancy, and resistance to waves. Here are some popular hull designs to consider:

Pontoon Hulls

Pontoon hulls are known for their stability and versatility. They typically consist of multiple pontoons, often made of aluminum or steel, connected by a deck. Pontoons provide a wide base, making the houseboat less prone to rocking and providing ample storage space below.

Monocoque Hulls

Monocoque hulls are single-piece structures, often constructed from fiberglass or steel. They offer a sleek, streamlined profile and are generally more fuel-efficient than pontoon hulls. However, they can be less stable in rough waters and may require more specialized construction techniques.

Catamaran Hulls

Catamaran hulls feature two parallel hulls, creating a wider footprint and providing excellent stability. They are often chosen for larger houseboats due to their spacious interior and ability to handle rough seas.

Prioritizing Structural Integrity

Ensuring the structural integrity of your houseboat is paramount. Here are some crucial considerations:

  • Materials: Choose durable and water-resistant materials for the frame, walls, and roof. Marine-grade plywood, treated lumber, and fiberglass are excellent options.
  • Framing: Use sturdy framing members to support the weight of the structure and resist flexing and twisting. Consider using steel or aluminum for added strength.
  • Insulation: Insulation is essential for creating a comfortable and energy-efficient living space. Choose moisture-resistant insulation materials suitable for marine environments.
  • Flooring: Opt for waterproof flooring materials that can withstand moisture and foot traffic. Vinyl, tile, or composite decking are popular choices.

Optimizing Space in a Compact Layout

Creating a functional and comfortable living space within a compact houseboat requires clever design solutions. Here are some tips to maximize space:

Multifunctional Furniture

Invest in furniture that serves multiple purposes, such as a sofa bed that converts into a guest bed or a dining table that folds down to create additional floor space.

Vertical Storage

Utilize vertical space for storage by incorporating shelves, cabinets, and overhead compartments. This helps keep belongings organized and out of the way.

Open Floor Plan

An open floor plan creates a sense of spaciousness. Consider removing walls to create a seamless flow between living areas.

Essential Systems and Amenities

A comfortable houseboat requires a variety of essential systems and amenities:

Water and Sewage Systems

Install a reliable freshwater system with storage tanks and a water heater. A holding tank for wastewater and a pump-out system are also necessary.

Electrical System

Provide adequate electrical power with solar panels, generators, and a battery bank. A reliable electrical system is crucial for lighting, appliances, and comfort.

Heating and Cooling

Consider installing a heating and cooling system to maintain a comfortable temperature year-round. Choose systems designed for marine environments.

Safety and Regulations

Safety and compliance with regulations are paramount. Here are some important considerations:

  • Fire Safety: Equip your houseboat with fire extinguishers, smoke detectors, and a fire suppression system. Ensure proper ventilation.
  • Navigation Lights: Install proper navigation lights to make your houseboat visible at night.
  • Life Jackets: Always keep enough life jackets on board for every person.
  • Local Regulations: Familiarize yourself with local regulations for houseboats, including registration, mooring, and wastewater disposal.

Building a compact, sturdy houseboat requires careful planning, skilled craftsmanship, and a commitment to safety. By following these guidelines and working with experienced professionals, you can create a unique and comfortable floating home that allows you to embrace a life on the water.

Building a Wooden Duck Boat for Hunting and Fishing

Building a Wooden Duck Boat for Hunting and Fishing

Building a Wooden Duck Boat for Hunting and Fishing

A wooden duck boat, with its timeless elegance and unparalleled performance, is a dream for many waterfowlers and anglers. Building one yourself is an immensely rewarding experience, blending craftsmanship with the satisfaction of creating a custom vessel perfectly tailored to your needs. This article will guide you through the process of constructing your own wooden duck boat, from design to finishing, ensuring you have a reliable and beautiful companion for your adventures on the water.

Choosing the Right Design

The first step in building your duck boat is choosing the right design. Consider your intended use â€" duck hunting, fishing, or a combination of both â€" and the size and weight capacity you require. You can find numerous free plans online or purchase detailed blueprints from reputable boatbuilders.

Research different hull shapes like the traditional “V-hull” for stability in rough waters or the flatter “tunnel hull” for shallow water access. Consider the length, beam, and draft, ensuring they align with your desired performance and the waterways you’ll navigate. Additionally, factor in the materials you plan to use â€" traditional wood like cedar or mahogany or more modern options like plywood â€" as they influence the weight, durability, and overall aesthetics of your boat.

Gathering the Materials

Once you have your design finalized, gather all the necessary materials. This includes:

  • Wooden planks or plywood, depending on your chosen design
  • Marine-grade plywood for the bottom and transom
  • Wooden stringers and ribs for structural support
  • Fasteners like screws, nails, and epoxy
  • Fiberglass cloth and resin for added strength and water resistance
  • Paint, varnish, and sealant for protection and finishing
  • Hardware for seats, oarlocks, and any other desired features

It's crucial to source high-quality materials, especially for the hull, to ensure the boat's longevity and stability. Don't skimp on the quality of your wood, as this will significantly impact the final product's performance and lifespan.

Constructing the Hull

The construction of the hull is a crucial part of the process. Carefully follow your chosen plans, ensuring accurate measurements and precise cuts. Begin by building the frame, using stringers and ribs to create the skeletal structure of the boat. Attach these to the transom, which will be the stern of your boat and provide crucial support.

Next, carefully lay the planks or plywood sheets onto the frame, ensuring they are properly spaced and aligned. This step may require specialized tools like a boatbuilding jig and clamps. If using traditional planks, you̢۪ll need to carefully join them together, using techniques like scarf joints or lap joints, for a smooth and watertight hull.

Adding Strength and Protection

Once the hull is assembled, it needs to be reinforced and protected. This involves applying fiberglass cloth and resin to the entire surface. This layer, known as “glassing,” adds significant strength and water resistance. Be sure to use marine-grade epoxy for optimal protection against the elements.

After the fiberglass has cured, you can begin the finishing process. Smooth out any rough edges and imperfections using sandpaper. Apply a few coats of marine-grade paint, varnish, or sealant to protect the wood and give your boat a beautiful and durable finish.

Finishing Touches

Now that your boat is structurally sound and protected, you can add the final touches. Install seats, oarlocks, and any other desired hardware. Consider adding non-slip surfaces to the deck for safety.

Finally, consider adding a custom nameplate or decorative elements that reflect your personality and love for the sport. Your wooden duck boat is now ready to take you on unforgettable hunting and fishing adventures. Remember, building a boat is a labor of love that takes time and patience. Be sure to document your progress and enjoy the journey of creating your own unique and functional masterpiece.

How to Build a Wooden Canoe: A Beginner̢۪s Guide

How to Build a Wooden Canoe: A Beginner’s Guide

How to Build a Wooden Canoe: A Beginner's Guide

Crafting a wooden canoe is a rewarding endeavor, combining traditional woodworking techniques with a touch of artistry. While it may seem daunting at first, this comprehensive guide will equip you with the knowledge and skills necessary to embark on this exciting journey. From selecting materials to mastering essential skills, we'll provide step-by-step instructions for building a beautiful and functional canoe.

Choosing the Right Wood

The choice of wood is paramount in canoe construction, impacting both the canoe's durability and aesthetics. Here's a breakdown of popular choices:

Cedar

Lightweight, aromatic, and naturally resistant to rot, cedar is a classic choice for canoe construction. Its light color and beautiful grain pattern enhance the canoe's visual appeal. However, cedar is relatively soft, requiring careful handling during construction.

Spruce

Another popular choice, spruce offers a good balance of strength and lightness. Its straight grain and even texture make it relatively easy to work with. Spruce is slightly heavier than cedar but provides greater durability.

White Pine

White pine is an excellent option for its workability and strength. Its soft texture allows for easy shaping, while its inherent strength ensures a sturdy canoe. However, white pine is prone to moisture damage, requiring proper maintenance.

Essential Tools and Equipment

Before you begin, ensure you have the following tools and equipment on hand:

  • Hand plane: For smoothing and shaping wood.
  • Chisels: For cutting and shaping wood.
  • Saw: A handsaw or a circular saw for cutting lumber.
  • Hammer: For driving nails and securing parts.
  • Screwdriver: For assembling components.
  • Clamps: For holding parts securely during assembly.
  • Measuring tape: For accurate measurements.
  • Level: For ensuring even surfaces.
  • Sandpaper: For smoothing and finishing the canoe.
  • Epoxy resin: For bonding and sealing wood.
  • Fiberglass cloth: For adding strength and water resistance.
  • Paint or varnish: For protecting the wood from weather elements.

Canoe Construction Process

Building a wooden canoe involves several key steps:

1. Design and Plans

Begin by selecting a design plan for your canoe. Numerous plans are available online and in books, catering to different lengths, widths, and styles. Ensure the plan is detailed and includes dimensions, materials, and construction instructions.

2. Cutting and Shaping

Cut and shape the wood according to the plan. This step requires precision and patience. Use hand planes, chisels, and saws to achieve the desired shape. Ensure all parts fit perfectly before proceeding.

3. Stems and Ribs

The stems are the forward and aft ends of the canoe, providing shape and strength. The ribs, also known as frames, form the canoe's curvature. These components are carefully joined to the planking using epoxy resin and clamps.

4. Planking

The planking forms the canoe's hull and is attached to the ribs. Start with the bottom planking, working your way up the sides. Ensure the planking is properly aligned and secured with epoxy resin.

5. Decks and Gunwales

Once the planking is complete, install the decks, which provide a platform for seating and storage. The gunwales are the top edges of the canoe, adding strength and stability. Secure these components with epoxy resin and clamps.

6. Finishing Touches

Sand the entire canoe to a smooth finish, removing any imperfections. Apply multiple coats of epoxy resin to seal the wood and protect it from water damage. Finally, paint or varnish the canoe to enhance its appearance and provide additional protection.

Tips for Successful Canoe Building

  • Invest in quality tools and materials. Using high-quality tools and materials will ensure a durable and aesthetically pleasing canoe.
  • Take your time and be patient. Canoe building is a time-consuming process. Do not rush any step, as haste can lead to errors.
  • Read and understand the plans thoroughly. Familiarity with the plans is crucial for accurate construction.
  • Use clamps liberally to ensure tight joints. Clamps are essential for maintaining proper alignment and securing components during assembly.
  • Sand and finish meticulously. A well-sanded and finished canoe will be more durable and visually appealing.

Conclusion

Building a wooden canoe is an enriching experience that combines traditional woodworking techniques with modern materials. By following this beginner's guide and practicing patience and precision, you can create a beautiful and functional canoe that will provide years of enjoyment. Remember to celebrate your accomplishment, for you have crafted a piece of history with your own hands.

How to Construct a Wooden Canoe Hull with Free Plans

How to Construct a Wooden Canoe Hull with Free Plans

Building a Wooden Canoe Hull from Free Plans: A Journey of Craft and Adventure

The allure of a wooden canoe is undeniable. The graceful lines, the scent of fresh wood, and the feeling of handcrafted quality all beckon you to the water. Building your own canoe from free plans is a rewarding experience, allowing you to connect with the craft tradition and create a vessel that reflects your unique vision. This article will guide you through the process, providing a comprehensive overview of the steps involved.

Choosing the Right Plan

The first step is to find a set of free canoe plans that suit your needs and skill level. Numerous websites offer free plans for various canoe designs, from simple, beginner-friendly models to more intricate, advanced designs. Consider factors like:

  • Length and width: Determine the desired size for your canoe based on your intended use, number of paddlers, and storage space.
  • Hull shape: Explore different hull designs, such as flat-bottomed, rounded, or V-shaped, to understand their performance characteristics in different water conditions.
  • Material requirements: Check the plan's specifications for the type and quantity of wood required, ensuring that you have access to the necessary materials.

Once you've found a suitable plan, download and carefully review it. Familiarize yourself with the terminology, construction techniques, and any special instructions provided.

Gathering Materials and Tools

After choosing your plan, gather the necessary materials and tools. The plan will outline the specific types and quantities of wood required, along with any additional materials like epoxy, fiberglass cloth, and paint. You'll need tools such as:

  • Hand saws and power saws for cutting wood.
  • Planes and chisels for shaping and smoothing wood surfaces.
  • Measuring tapes, rulers, and squares for accurate measurements.
  • Clamps and vices for holding pieces together during construction.
  • Sandpaper, sanding blocks, and a sander for finishing the hull.
  • Brushes and rollers for applying epoxy and paint.

Ensure you have a safe and well-lit workspace with adequate ventilation, especially when working with epoxy.

Building the Canoe Hull: Step-by-Step

The construction process can be broken down into several distinct stages:

Cutting and Shaping the Planks

Carefully cut the planks according to the plan's dimensions. Use a combination of hand saws and power saws to achieve precise cuts. After cutting, shape the planks to conform to the canoe's hull curvature using planes, chisels, and sanding tools. This is a meticulous process that requires patience and attention to detail.

Joining the Planks

Once the planks are shaped, join them together using a combination of wood glue, screws, and epoxy. Follow the plan's instructions for the specific joining method employed. Clamps and vices are essential for ensuring a secure and tight bond between the planks.

Adding Ribs and Stems

The ribs provide structure and support to the canoe's hull, while the stems define the bow and stern. Cut and shape the ribs and stems according to the plan's specifications. Attach them to the planking using wood glue, screws, and epoxy. Ensure the ribs are properly spaced and aligned to maintain the canoe's desired shape.

Finishing the Hull

Once the hull is assembled, sand it smooth with sandpaper and sanding blocks. This process removes any rough edges and prepares the surface for finishing. Apply several coats of epoxy to seal the wood and protect it from water damage. Then, apply a final coat of paint or varnish to provide a beautiful finish and further protect the hull.

Launching Your New Canoe

After allowing the final coats of epoxy and paint to cure properly, you're ready to launch your new canoe! Take it for a test paddle on calm waters, and gradually introduce it to more challenging conditions as you gain confidence. As you glide across the water in your handcrafted canoe, you'll savor the satisfaction of building something beautiful and functional with your own two hands.

Safety and Maintenance

Always prioritize safety when using your canoe. Wear a personal flotation device (PFD), and be aware of weather conditions. Regularly inspect your canoe for any signs of damage and repair them promptly. Maintain the epoxy and paint finish to keep your canoe looking its best and protecting it from the elements.

Building a wooden canoe is a journey that combines craftsmanship, creativity, and a deep appreciation for nature. With patience, dedication, and the right tools, you can create a timeless vessel that will provide years of enjoyment on the water.

Step-by-Step Fishing Boat Construction Plans for Beginners

Step-by-Step Fishing Boat Construction Plans for Beginners

Step-by-Step Fishing Boat Construction Plans for Beginners

Hey there, fellow fishing enthusiasts! Ever dreamed of building your own fishing boat? It might sound daunting, but trust me, it's more achievable than you think, even for a beginner like yourself. I'm here to walk you through the process, step-by-step, with a whole lot of helpful tips and tricks along the way.

Planning Your Fishing Boat

Before you dive headfirst into the construction process, let's first take a moment to plan everything out. Think of it like mapping out your fishing trip, but for your boat instead. We'll cover the basics like size, type, and material. This will help us understand your needs and the construction process.

1. Size and Type

The first thing you'll want to consider is the size and type of boat you want to build. Are you planning on fishing solo in calm waters, or do you need a larger boat to accommodate friends and rougher conditions? Here are some popular types of fishing boats for beginners:

  • Jon Boats: Simple, flat-bottomed boats great for shallow water fishing. Easy to build, but generally smaller in size.
  • Pontoon Boats: Stable and spacious, perfect for larger groups. These have a more complex construction, but the wide, buoyant pontoons offer excellent stability.
  • Skiffs: Versatile and lightweight, suitable for a variety of fishing styles. These offer a good balance of stability and maneuverability.
  • 2. Materials

    The next step is choosing the right material for your boat. The most common materials for beginner boat builders include:

  • Plywood: Lightweight and affordable, but requires careful sealing for water resistance.
  • Fiberglass: Strong and durable, but requires specialized skills and tools. Fiberglass is considered more advanced for a beginner.
  • Aluminum: Very durable and lightweight, but can be more expensive than other options.
  • Gathering Your Tools and Materials

    Now that you've planned your boat, it's time to gather your tools and materials. Remember, you don't need to buy everything at once. Start with the essentials and add more as you progress.

    Essential Tools:

  • Saw (circular or jigsaw): Cutting wood to size.
  • Drill: Drilling holes for fasteners and other purposes.
  • Screwdriver: Securing wood pieces together.
  • Clamps: Holding pieces together during construction.
  • Measuring tape: Ensuring precise measurements.
  • Level: Making sure the boat is level and straight.
  • Sandpaper: Smoothing out rough edges and preparing surfaces for paint.
  • Safety Gear: Gloves, eye protection, and hearing protection are essential for safety.
  • Essential Materials:

  • Wood (if using plywood): Marine-grade plywood is best for boat building.
  • Fasteners: Screws, nails, and other hardware to hold the boat together.
  • Epoxy: Sealing and strengthening seams. Epoxy is very strong and waterproof.
  • Fiberglass (if using fiberglass): Fabric used to reinforce the boat's hull.
  • Paint: Protecting the wood and adding a finishing touch.
  • Step-by-Step Construction Process

    Alright, let's get into the fun part! Here's a step-by-step guide for building your fishing boat:

    1. Building the Hull

    This is the foundation of your boat, so take your time and be precise.

  • Cut out the hull panels: Use your plans as a guide and carefully cut out the plywood pieces for the bottom, sides, and transom.
  • Assemble the hull: Fit the panels together, making sure the edges are flush and square. Use clamps to hold the pieces together while you secure them with screws or epoxy.
  • Reinforce the hull: Add extra support beams or bulkheads to make the hull stronger and prevent flexing.
  • Seal the seams: Use epoxy to seal all seams and joints, creating a watertight hull. Allow the epoxy to cure completely before moving on to the next step.
  • 2. Building the Deck

    The deck is the upper part of your boat where you'll be standing, fishing, and relaxing. You'll need to create a strong and stable platform.

  • Cut and assemble the deck boards: Use your plans to cut the deck boards to size and assemble them, creating a strong and stable platform.
  • Attach the deck to the hull: Secure the deck to the hull using screws or epoxy. Make sure the connection is strong and watertight.
  • Add any necessary supports or beams: If your design calls for additional support beams or ribs, install them now, making sure they are securely attached to the deck and hull.
  • 3. Adding the Features

    Now comes the fun part! You can add any custom features that will enhance your fishing experience. Consider things like seating, storage compartments, and a fishing platform.

  • Install seating: Build or purchase seats that are comfortable and secure. Make sure the seats are well-supported and anchored to the deck.
  • Add storage compartments: Create storage spaces to hold your fishing gear, tackle boxes, and other essentials. Use plywood, fiberglass, or other durable materials for these compartments.
  • Build a fishing platform: For anglers who enjoy standing while fishing, a raised platform can provide a better vantage point and more stability.
  • 4. Finishing Touches

    Your fishing boat is almost complete! Take the time to add some finishing touches that will make it look great and protect it.

  • Sanding and smoothing: Sand down any rough edges and imperfections, creating a smooth surface. Use different grits of sandpaper to achieve a smooth finish.
  • Painting and sealing: Protect the wood with paint or sealant. Choose a paint or sealant that is durable and water-resistant.
  • Commonly Asked Questions

    Here are some common questions I often get asked:

    1. How much does it cost to build a fishing boat?

    The cost will vary depending on the size, materials, and complexity of your boat. A simple jon boat built with plywood could cost a few hundred dollars, while a larger pontoon boat made with fiberglass might cost several thousand.

    2. How long does it take to build a fishing boat?

    The time it takes to build a boat will depend on your experience, the complexity of the design, and the amount of time you can dedicate to the project. A simple jon boat could take a few weeks to build, while a larger boat might take several months.

    3. Do I need any special skills to build a boat?

    Basic woodworking skills are helpful, but not required. There are many resources available to help you learn along the way, like online tutorials, books, and even boat building classes.

    4. What if I make a mistake?

    Everyone makes mistakes, even seasoned boat builders. Don't be afraid to experiment and learn from your mistakes. Just remember to measure twice and cut once, and you'll be fine.

    Building your own fishing boat can be a challenging but rewarding project. It's a chance to create a custom-made boat tailored to your specific needs and preferences. And remember, with careful planning, attention to detail, and some patience, you can bring your fishing boat dreams to life!

    Wooden Rowboat Plans for Multi-Purpose Use

    Wooden Rowboat Plans for Multi-Purpose Use

    Wooden Rowboat Plans: Crafting a Versatile Watercraft

    Embrace the timeless allure of wooden boatbuilding and craft a versatile rowboat that seamlessly blends utility and craftsmanship. Whether you seek a tranquil escape on serene lakes, a reliable fishing companion, or a sturdy tender for your larger vessel, these plans guide you through every step of the construction process.

    Choosing the Right Design

    The journey begins with selecting the perfect rowboat design. Consider the intended use, desired size, and personal preferences. Do you envision a sleek, lightweight skiff for solo adventures or a roomy, stable craft for family outings? Popular options include:

    Traditional Dory

    A classic design known for its seaworthiness and stability, the dory boasts a wide, flat bottom and flaring sides. Ideal for fishing and coastal cruising.

    Lightweight Skiff

    Lightweight and nimble, the skiff excels in shallow waters and maneuvering tight spaces. It's perfect for solo paddling and exploring hidden coves.

    Punt

    A flat-bottomed boat with a square bow, the punt is known for its shallow draft and excellent stability. Ideal for leisurely rowing on canals and rivers.

    Gathering the Materials

    Once you've chosen a design, assemble the necessary materials. For a classic wooden rowboat, you'll need:

    • Wood: Select high-quality marine-grade plywood, cedar, or oak for the hull, ribs, and transom. Consider the wood's strength, water resistance, and aesthetics.
    • Fasteners: Marine-grade stainless steel screws and nails ensure long-lasting durability.
    • Epoxy: A strong and water-resistant epoxy resin for bonding the wood and protecting the hull.
    • Paint or Varnish: Choose a marine-grade finish that protects the wood from weather and UV damage.
    • Oars: Select lightweight and sturdy oars that are the appropriate length for your boat.
    • Rowlocks: Securely attach the oars to the rowboat using high-quality rowlocks.
    • Hardware: Gather essential hardware such as cleats, rings, and a thwart (seat) to complete the boat's functionality.

    Building the Rowboat: A Step-by-Step Guide

    With the materials gathered, begin the construction process, carefully following the plans and using precise measurements:

    1. Cut the Wood: Utilize accurate cutting tools to shape the hull, ribs, and transom according to the plans.
    2. Assemble the Frames: Connect the ribs to the transom, forming the boat's skeletal structure.
    3. Attach the Planking: Securely fasten the plywood or wooden planks to the frames, creating the watertight hull.
    4. Epoxy and Sanding: Apply epoxy to the hull seams and thoroughly sand the surface for a smooth finish.
    5. Add the Interior Features: Install the thwart, rowlocks, and other hardware according to the plans.
    6. Paint or Varnish: Protect the boat with a durable marine-grade paint or varnish.
    7. Finishing Touches and Launching

      Once the construction is complete, add those finishing touches to your handcrafted masterpiece. Install oarlocks, seats, and any other desired hardware. Carefully launch your rowboat, ensuring it's stable and balanced.

      As you glide across the water, you'll appreciate the unique character and durability of your wooden rowboat. Each stroke of the oars will be a testament to your skills and the timeless beauty of handcrafted craftsmanship.

    How to Build a Wooden Powerboat: Materials and Instructions

    How to Build a Wooden Powerboat: Materials and Instructions

    Building Your Own Wooden Powerboat: A Guide for the Aspiring Shipwright

    Building a wooden powerboat is a challenging yet rewarding project. It's a journey that combines woodworking skills, engineering knowledge, and a passion for the water. Whether you're a seasoned boat builder or a curious newcomer, this guide will walk you through the essential steps, materials, and considerations involved in creating your own wooden masterpiece.

    Step 1: Planning Your Dream Boat

    Before diving into the construction, you need a clear vision. Ask yourself these key questions:

    • What kind of boat do you want to build? Consider size, hull type (planing or displacement), number of passengers, and intended use (fishing, cruising, racing).
    • What are your skill level and budget? A simple design with basic construction techniques is a good starting point for beginners. More intricate designs require greater expertise and cost.
    • Where will you build your boat? You'll need a workspace with ample room for the boat, tools, and materials.

    Step 2: Gathering the Right Materials

    The materials used in wooden boat construction are crucial for durability, performance, and aesthetics. Here's a rundown of the common components:

    Lumber:

    • Marine-grade plywood: Used for the hull, decks, and interior panels. Look for plywood specifically designed for marine use, as it's treated to resist moisture and rot. Common choices include Okoume, mahogany, and Douglas fir.
    • Solid wood: Used for framing, stringers, keel, and other structural components. Popular options include cedar, oak, mahogany, and teak.

    Fasteners:

    • Bronze screws and bolts: Highly resistant to corrosion, making them ideal for marine environments.
    • Stainless steel fasteners: A cost-effective alternative to bronze, but ensure they are marine-grade and not susceptible to galvanic corrosion.

    Epoxy and Fiberglass:

    • Epoxy resin: Stronger and more water-resistant than traditional polyester resin, making it the preferred choice for wooden boat construction.
    • Fiberglass cloth: Used for reinforcing the hull and deck, providing additional strength and watertightness.

    Other Materials:

    • Paint and varnish: For protecting the wood from the elements and enhancing aesthetics.
    • Hardware: Includes cleats, chocks, handrails, and other fittings.
    • Engine and accessories: Choose an engine that fits your boat's size and intended use, along with a propeller, steering system, fuel tank, and electrical components.

    Step 3: Choosing the Right Plans

    Don't try to reinvent the wheel! There are countless boat plans available from reputable sources, covering a wide range of designs and skill levels.

    • Consider your experience level: Beginners should opt for simpler plans with detailed instructions and diagrams.
    • Seek expert advice: Talk to experienced boat builders or join boatbuilding forums to gather recommendations and tips.
    • Look for plans that offer support: Some plans come with online forums or phone support, which can be invaluable during the build process.

    Step 4: Building the Hull

    The hull is the heart of your boat. Here's a simplified breakdown of the process:

    • Lay out the frames: Using the boat plans as a guide, carefully cut and assemble the frames that will form the shape of the hull.
    • Attach the planking: Carefully attach the planks of marine-grade plywood or solid wood to the frames, creating a smooth and watertight shell.
    • Fair the hull: Once the planking is complete, use sanding and other techniques to smooth out the hull and ensure a perfect curve.
    • Apply epoxy and fiberglass: Multiple layers of epoxy resin and fiberglass cloth are used to strengthen the hull and create a waterproof barrier.

    Step 5: Building the Deck and Interior

    Once the hull is finished, you can move on to the deck and interior.

    • Construct the deck: Follow the plans to build the deck frame and attach the decking material. Consider using non-slip materials for safety.
    • Install the interior: Build the seats, benches, storage compartments, and other interior features according to your design.
    • Fit the engine and accessories: Mount the engine, steering system, fuel tank, and other components as specified in the plans.

    Step 6: Finishing Touches

    The final stages involve adding those finishing touches that make your boat truly unique.

    • Paint and varnish: Protect the wood with marine-grade paint and varnish, applying multiple coats for maximum durability.
    • Install hardware: Mount cleats, handrails, chocks, and other hardware according to your needs and the boat's design.
    • Add personal touches: Consider adding decorative accents, a custom nameplate, or other details that reflect your style.

    Step 7: Testing and Commissioning

    Before launching your new boat, it's essential to test its seaworthiness.

    • Perform a water test: Start with a shallow water test to ensure the hull is watertight and the engine runs smoothly.
    • Seek professional inspection: Once the initial tests are complete, have a qualified marine surveyor inspect the boat for any potential issues.
    • Register and obtain permits: Ensure your boat is properly registered and meets any local regulations before venturing out on the water.

    Commonly Asked Questions

    How long does it take to build a wooden powerboat?

    The construction time depends on the boat's complexity, your experience, and the amount of time you can dedicate to the project. Simple designs can be completed in a few months, while more intricate boats can take years.

    How much does it cost to build a wooden powerboat?

    The cost varies greatly depending on the size, materials, and complexity of the boat. Expect to invest several thousand dollars, with costs increasing as the boat grows larger and more sophisticated.

    Do I need any special skills to build a wooden powerboat?

    While basic woodworking skills are helpful, you don't need to be a master carpenter to build a wooden powerboat. There are plenty of plans and resources available for beginners, and you can always learn new techniques along the way.

    Where can I find help and guidance?

    Join online boatbuilding forums, attend woodworking classes, and seek advice from experienced boat builders. There are numerous resources available to support your journey.

    Building your own wooden powerboat is a rewarding experience that combines skill, passion, and a deep connection to the water. Embrace the challenge, learn from your mistakes, and enjoy the process of creating something truly special.

    Wooden Fishing Boat Plans for Efficient, Practical Builds

    Wooden Fishing Boat Plans for Efficient, Practical Builds

    Wooden Fishing Boat Plans for Efficient, Practical Builds

    Embark on a journey of handcrafted maritime excellence with our comprehensive guide to building efficient and practical wooden fishing boats. This guide will equip you with the knowledge and tools needed to transform your vision into a sturdy and functional vessel. We will delve into the essential aspects of boat design, construction, and materials, empowering you to create a boat that will serve your fishing needs for years to come.

    Choosing the Right Plans

    Before embarking on your wooden boat construction journey, it is crucial to select the right plans. The world of boat design offers an abundance of options, from simple dinghies to sophisticated trawlers. Consider your intended use, fishing style, and desired size. Do you need a nimble skiff for exploring shallow waters or a larger, more robust boat for venturing further offshore?

    Understanding Boat Types

    Familiarise yourself with various boat types suitable for fishing, including:

    • Skiffs: Lightweight and versatile, ideal for shallow waters and smaller fish.
    • Dories: Traditional, rounded hull designs known for stability and seaworthiness.
    • Jon Boats: Flat-bottomed, durable vessels, perfect for casting and trolling.
    • Outboard Boats: Versatile and efficient, accommodating a range of outboard motors.

    Once you have a good understanding of your fishing needs and boat types, you can explore available plans from reputable sources like boat design websites, marine supply stores, and online forums.

    Essential Materials for Wooden Boat Building

    The quality of your materials is paramount to the longevity and performance of your wooden boat. Invest in high-quality wood that is resistant to rot and decay. Consider these options:

    • Cedar: Known for its natural resistance to rot and insects, cedar offers excellent durability.
    • Oak: Strong and durable, oak adds a touch of elegance to your boat.
    • Mahogany: This premium wood is prized for its beauty and durability, but it comes at a higher cost.

    In addition to wood, you will need other essential materials:

    • Marine plywood: For interior construction and bulkheads.
    • Epoxy resin and fiberglass cloth: To provide watertightness and structural reinforcement.
    • Fasteners: Marine-grade screws, bolts, and rivets.
    • Paint and varnish: To protect your boat from the elements and add a finishing touch.

    Construction Techniques

    The construction of your wooden boat involves a meticulous process, demanding precision and attention to detail. Choose a suitable workspace that provides adequate ventilation and protection from the elements. The traditional methods of boat building include:

    • Carvel planking: This method involves laying planks flush with each other, creating a smooth and sleek hull.
    • Clinker planking: Planks overlap, creating a stronger, more durable hull. This method is often favored for fishing boats due to its resilience.

    Follow the plans carefully, ensuring proper alignment and securing the planks with marine-grade fasteners. Apply epoxy resin and fiberglass cloth to the hull for a waterproof and robust finish. Use a sanding block to create a smooth surface for painting.

    Finishing Touches

    Once the construction is complete, it is time to add the finishing touches to your wooden fishing boat. Apply a high-quality marine paint or varnish to protect the wood from the elements and enhance its aesthetic appeal. Choose colors that provide good visibility and blend harmoniously with your surroundings. Install essential equipment, such as:

    • Outboard motor: Select the appropriate size and horsepower for your boat.
    • Fishing rod holders: Ensure easy access to your fishing gear.
    • Navigation lights: Ensure visibility at night and in low-light conditions.

    Conclusion

    Building a wooden fishing boat is a rewarding and fulfilling endeavor. With careful planning, diligent construction, and a passion for the water, you can create a custom vessel that meets your fishing needs and embodies the spirit of the sea. Remember to prioritize safety and acquire the necessary knowledge and skills before embarking on your boat building journey. The journey may be challenging, but the reward of having a handcrafted boat of your own is truly priceless.