Wednesday, November 20, 2024

How to Build a Durable and Fast Mini Jet Boat

How to Build a Durable and Fast Mini Jet Boat

Building a Durable and Fast Mini Jet Boat: A Comprehensive Guide

The thrill of zipping across the water at breakneck speeds in a sleek, powerful mini jet boat is an experience that many crave. However, building one that's both durable and fast requires careful planning and execution. This guide will lead you through the process, equipping you with the knowledge and expertise to create your dream mini jet boat.

Choosing the Right Materials

The heart of a durable mini jet boat lies in the materials you select. Choosing wisely will not only ensure a long-lasting vessel but also contribute to its overall performance.

The Hull

For the hull, consider these options:

  • Fiberglass: Lightweight and durable, fiberglass is a classic choice for boat construction. It offers excellent strength-to-weight ratio and can be molded into complex shapes.
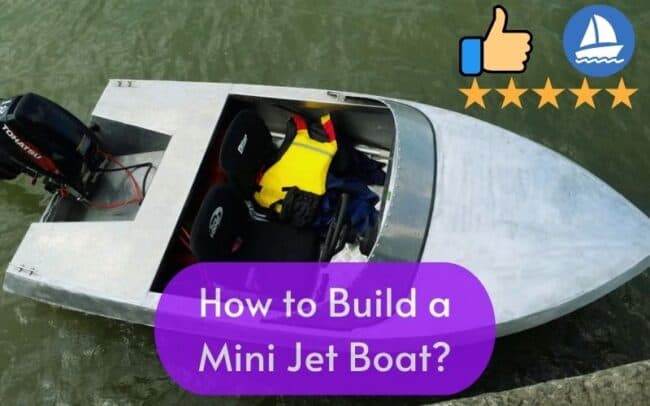
  • Aluminum: A robust and corrosion-resistant option, aluminum is particularly suitable for freshwater applications. Its durability and relative ease of fabrication make it a popular choice.
  • Polyethylene: This high-density plastic is known for its impact resistance and affordability. It's often used for smaller, recreational boats, but it might not be the ideal choice for high-performance applications.

The Jet Drive

For maximum speed and agility, a jet drive system is essential. Consider the following factors when choosing a jet drive:

  • Impeller size: A larger impeller will deliver more thrust, but it will also require more horsepower to operate.
  • Nozzle design: The shape and size of the nozzle influence the water flow and the boat's overall speed.
  • Material: Stainless steel is generally preferred for jet drives due to its strength and corrosion resistance.

The Engine

The engine is the heart of your mini jet boat. Choose an engine that offers a balance of power and efficiency:

  • Two-stroke engines: Lightweight and powerful, two-stroke engines are popular choices for mini jet boats. However, they tend to be less fuel-efficient than four-stroke engines.
  • Four-stroke engines: More fuel-efficient and environmentally friendly than two-strokes, four-stroke engines are gaining popularity in the mini jet boat market.

Constructing the Hull

Building the hull is the most challenging but rewarding part of the process. Follow these steps to ensure a strong and watertight hull:

  1. Design and Create the Molds: If you're using fiberglass, you'll need to create molds to shape the hull. Use wood or another suitable material to build a strong, accurate mold.
  2. Lay Up the Fiberglass: Carefully apply layers of fiberglass cloth and resin to the molds, following a specific pattern to ensure proper strength and water resistance.
  3. Sand and Finish: After the fiberglass has cured, carefully sand the hull to remove imperfections and achieve a smooth surface. Apply a sealant and paint to protect the hull from the elements.

Installing the Jet Drive

Installing the jet drive system is critical for the boat's performance. It's important to follow the manufacturer's instructions carefully:

  1. Mount the Jet Drive: Secure the jet drive to the transom of the hull using sturdy brackets and bolts.
  2. Connect the Drive Shaft: Align the drive shaft with the engine output shaft and connect them using a coupling.
  3. Install the Steering System: Choose a reliable steering system and connect it to the jet drive.

Powering the Boat

Once the hull and jet drive are in place, it's time to install the engine. This requires careful planning and attention to detail:

  1. Mount the Engine: Secure the engine to the boat's transom using sturdy mounts. Consider the engine's weight distribution and balance.
  2. Connect the Engine to the Jet Drive: Connect the engine's output shaft to the jet drive's input shaft using a coupling.
  3. Install the Fuel System: Connect the fuel tank to the engine and install a fuel filter.

Completing the Build

After installing the engine and jet drive, you need to finish the boat by adding essential components and systems:

  • Control Panel: Install a control panel with gauges and controls for the engine, jet drive, and steering.
  • Seating and Storage: Add comfortable seating and storage compartments to enhance the boat's usability.
  • Safety Equipment: Ensure you have essential safety equipment, including life jackets, fire extinguishers, and flares.

Testing and Fine-Tuning

Once your mini jet boat is assembled, it's crucial to test it thoroughly:

  1. Initial Tests: Conduct initial tests in a controlled environment, like a small pond or lake, to assess the engine and jet drive performance.
  2. Fine-Tuning: Adjust engine settings, jet drive angles, and steering to optimize the boat's performance.
  3. Safety First: Always prioritize safety when testing a new boat. Use appropriate safety gear and follow all boating regulations.

Building a durable and fast mini jet boat is a challenging but rewarding project. With careful planning, meticulous craftsmanship, and attention to detail, you can create a vessel that will deliver years of thrilling adventures on the water. Remember to prioritize safety, follow all boating regulations, and enjoy the fruits of your labor!

Free Wooden Boat Plans for Small Crafts and Dinghies

Free Wooden Boat Plans for Small Crafts and Dinghies

Free Wooden Boat Plans for Small Crafts and Dinghies

For those seeking the satisfaction of building their own vessel, embarking on a wooden boat project can be an incredibly rewarding experience. The allure of crafting a timeless piece of nautical artistry from scratch is undeniable, and the process itself offers a journey of skill development and personal fulfillment. Fortunately, a wealth of free wooden boat plans are available online, providing aspiring boat builders with the blueprints and guidance to bring their dreams to life.

This article serves as a comprehensive guide to navigating the world of free wooden boat plans, focusing specifically on small crafts and dinghies. We will explore the advantages of building from plans, delve into the essential considerations for selecting the right plan, and provide a curated list of reputable resources offering a diverse range of boat designs.

The Advantages of Building from Plans

Building a boat from plans offers numerous benefits over purchasing a pre-built vessel:

  • Cost Savings: Building from plans can save significant money, as you only need to purchase the materials and tools, eliminating the cost of labor and factory production.
  • Customization: Plans allow you to personalize your boat by modifying designs, choosing different wood species, and selecting specific finishes. This customization empowers you to build a boat that perfectly reflects your preferences and intended use.
  • Educational Value: Building a boat from plans provides a hands-on learning experience, deepening your understanding of boat construction, woodworking techniques, and nautical principles.
  • Sense of Accomplishment: The journey of building a boat from scratch fosters a deep sense of satisfaction and accomplishment. You become the architect and builder of your own vessel, a testament to your skills and dedication.

Essential Considerations for Selecting a Plan

When selecting a free wooden boat plan, several key factors should guide your decision:

Intended Use

Clearly define how you intend to use the boat. Will it be for leisurely rowing, fishing, sailing, or a combination of activities? This will determine the necessary size, hull shape, and features.

Skill Level

Honestly assess your woodworking experience. Choose a plan that aligns with your skill level. Beginners may find simple dinghy designs more manageable, while experienced builders can tackle more complex projects.

Available Resources

Consider your access to tools, equipment, and materials. Some plans require specialized tools or specific wood species, so ensure you have the resources to complete the project.

Construction Time and Commitment

Evaluate the estimated construction time for the plan and ensure it aligns with your available time and commitment level. Boat building can be a time-consuming endeavor, requiring dedication and patience.

Reputable Resources for Free Wooden Boat Plans

The internet offers a vast array of free wooden boat plans. Here is a curated list of reputable resources, ensuring you access well-designed and reliable plans:

  • WoodenBoat.com: This website hosts a diverse collection of free plans, from dinghies to larger sailboats, all designed by experienced boat builders.
  • The Boatbuilding Forum: This online community provides access to free plans shared by members, as well as invaluable advice and support from experienced boat builders.
  • The Small Boat Builder: This website features a selection of free plans for small boats, focusing on simplicity and affordability.
  • Amateur Boatbuilding: This website offers a range of free plans for dinghies, rowing boats, and small sailboats, catering to various skill levels.
  • Duckworks Magazine: This publication offers a free plan section with a selection of boat designs, including dinghies, rowboats, and small sailboats.
  • The Chesapeake Light Craft: While this website primarily offers paid plans, it also provides a limited selection of free plans for simple dinghies and small boats.

Navigating the Plans

Free wooden boat plans typically include detailed drawings, specifications, and construction instructions. It's essential to carefully study the plans before beginning construction. Familiarize yourself with the following:

  • Dimensions and Scale: Understand the overall size and scale of the boat.
  • Material Specifications: Note the types and quantities of wood required.
  • Construction Techniques: Study the methods for assembling the hull, deck, and other components.
  • Assembly Sequence: Follow the specified order for building the boat, ensuring proper alignment and support.
  • Finishing Instructions: Learn how to apply coatings and finishes to protect and enhance the boat.

Building Your Wooden Boat

Once you have carefully reviewed the plans and gathered the necessary materials and tools, you can embark on the exciting journey of building your boat. The process generally involves the following steps:

  • Cutting and Shaping: Accurately cut and shape the wooden components using hand tools or power tools. This step requires precision and care to ensure proper fit and alignment.
  • Assembling the Hull: Join the wooden planks or frames together using traditional boatbuilding techniques, such as lapstrake construction, carvel construction, or plywood construction. This step often involves the use of epoxy, adhesives, and fasteners.
  • Adding the Deck and Superstructure: Build the deck, cabin, and other structural elements, ensuring they are properly integrated with the hull.
  • Installing Fittings and Accessories: Install seats, oars, rudders, sails, and other necessary components. This step requires careful attention to detail and proper installation techniques.
  • Finishing and Launching: Apply coatings, paint, and varnishes to protect and enhance the boat's appearance. Once completed, you can launch your boat and enjoy the fruits of your labor.

Conclusion

Building a wooden boat from free plans is a rewarding and fulfilling endeavor. By carefully selecting a plan, gathering the necessary resources, and following the instructions diligently, you can craft a beautiful and functional vessel that will provide years of enjoyment. Remember, patience, dedication, and attention to detail are essential for success. The journey itself, from planning to launching, is a testament to your skills and a celebration of the timeless art of wooden boatbuilding.

Building a Wooden Yacht with Free Plans: A Beginner’s Guide

Building a Wooden Yacht with Free Plans: A Beginner’s Guide

Building a Wooden Yacht with Free Plans: A Beginner’s Guide

The allure of crafting a wooden yacht from scratch is undeniable. The romance of the process, the satisfaction of creating something with your own hands, and the sheer beauty of a handcrafted vessel are just a few of the rewards that await. While the prospect of building a yacht might seem daunting, it's certainly achievable with the right guidance, tools, and, of course, a healthy dose of determination. This beginner's guide will equip you with the knowledge and resources to embark on your own wooden yacht-building journey.

1. Choosing Your Yacht Design

The first step is selecting the perfect design for your dream yacht. The internet offers a treasure trove of free plans for wooden yachts, each with its own unique character and complexity. Explore online resources like:

  • WoodenBoat.com
  • Boatdesign.net
  • The WoodenBoat Forum
  • Naval Architecture Websites

Consider your skill level, available time, and budget when making your selection. Start with a simpler design if you're a novice, gradually working your way up to more intricate builds.

2. Gathering Materials and Tools

Once you've chosen your plan, gather the necessary materials and tools. This will include:

  • Wood: Choose high-quality marine-grade wood like cedar, mahogany, or oak. Your chosen plan will specify the exact types and quantities needed.
  • Fasteners: Stainless steel screws, bolts, and rivets are essential for assembling the yacht.
  • Epoxy Resin and Hardener: These will be used for bonding and sealing the wood.
  • Fiberglass Cloth: Used for reinforcing the hull and deck.
  • Paint and Varnish: Protect your yacht from the elements with high-quality marine-grade paints and varnishes.
  • Power Tools: A circular saw, jigsaw, drill press, sander, and router will be your trusted companions in this endeavor.
  • Hand Tools: Hammers, chisels, planes, and measuring tools are essential for precise work.

Invest in high-quality tools; they will make the building process smoother and ensure a more durable final product.

3. Building the Hull and Deck

With your materials and tools assembled, you're ready to begin the heart of the project: building the hull and deck. Follow your chosen plans meticulously, paying close attention to details like frame spacing, plank thickness, and joint types. Don't rush; accuracy is crucial for a structurally sound vessel.

The building process involves several key steps:

  • Frame Construction: Assemble the framework that will provide the skeletal structure of the yacht.
  • Planking: Attach wooden planks to the frame, forming the hull's exterior. This step requires meticulous fitting and skillful use of woodworking tools.
  • Sheathing: Add layers of fiberglass cloth and epoxy resin to reinforce the hull, making it watertight and durable.
  • Deck Construction: Repeat the planking process for the deck, creating a sturdy platform for walking and maneuvering.

4. Installing the Interior and Exterior

Once the hull and deck are complete, focus on finishing the interior and exterior.

Interior elements include:

  • Cabin Construction: Build your cabin's framing and walls, adding insulation for comfort and warmth.
  • Furniture and Fittings: Install cabinetry, bunks, and other amenities that make your yacht a home away from home.
  • Electrical and Plumbing: Run wires and pipes for lighting, power, and sanitation. Remember to use marine-grade components.

Exterior elements include:

  • Cockpit Construction: Build your cockpit area, providing a comfortable space for steering, sailing, and relaxing.
  • Mast and Rigging: Install the mast, boom, and sails, ensuring they are properly aligned and secured.
  • Finishing Touches: Paint the hull and deck with your chosen colors, varnish the wood, and add any desired accents.

5. Launching and Enjoying Your Masterpiece

With the final touches complete, the moment of truth arrives. Launching your handcrafted yacht is a momentous occasion. Be sure to follow safety guidelines and have experienced hands on deck for the launch process. After launching, you'll need to test and refine the yacht's handling, making adjustments as needed.

Now, the true joy begins. Setting sail on your own wooden yacht, the product of your own hard work and dedication, is a truly fulfilling experience. You've conquered the challenges of boat building, crafted a masterpiece, and earned the satisfaction of sailing your creation across the water. Enjoy the fruits of your labor, cherish the memories created, and revel in the beauty of your handcrafted vessel.

Step-by-Step Instructions to Build Your Own Homemade Duck Boat

Step-by-Step Instructions to Build Your Own Homemade Duck Boat

Building Your Own Homemade Duck Boat: A Step-by-Step Guide

Embrace the thrill of paddling through tranquil waters, chasing ducks, or simply enjoying a leisurely afternoon with your own handcrafted duck boat. This detailed guide will walk you through the exciting process of building your very own duck boat from scratch. From gathering the necessary materials to assembling the final masterpiece, you'll learn every step involved in this rewarding project. Let's embark on this journey and create a unique vessel that reflects your personal style and passion for the outdoors.

Materials You’ll Need

Before you dive into building your duck boat, make sure you have all the essential materials ready. This ensures a smooth and efficient construction process. Gather the following items:

  • Plywood (1/2-inch or 3/4-inch thick)
  • Marine-grade plywood (optional, for added durability)
  • 2x4 lumber (for framing)
  • Fiberglass cloth
  • Epoxy resin
  • Paint (marine-grade or outdoor-rated)
  • Screws (stainless steel)
  • Wood glue
  • Caulking
  • Paddles (or an electric motor)
  • Safety equipment (life jackets, whistle)

Step-by-Step Construction

Now that you have your materials ready, let's get started with the exciting process of building your duck boat. Follow these steps carefully, ensuring each stage is completed with precision and attention to detail.

1. Designing Your Duck Boat

First, create a detailed design for your duck boat. This will help you visualize the final product and ensure it fits your needs and preferences. Consider the length, width, and depth of the boat, as well as the desired seating capacity. Sketch out your design on paper, using measurements to guide your blueprint.

2. Cutting the Plywood

Using your design as a guide, carefully cut the plywood sheets into the required shapes for the hull, deck, and any other components of your duck boat. Ensure you make accurate cuts to ensure a smooth and functional final product.

3. Building the Frame

Construct a sturdy frame using 2x4 lumber to support the hull and deck. Cut the lumber to the desired dimensions and assemble them using screws and wood glue. The frame should be strong enough to handle the weight of the boat and its occupants.

4. Attaching the Hull and Deck

Once the frame is securely assembled, attach the pre-cut plywood panels to the frame using screws and wood glue. Ensure all edges are flush and create a watertight seal.

5. Fiberglassing the Hull

For added durability and water resistance, apply several layers of fiberglass cloth and epoxy resin to the hull of your duck boat. This will create a protective barrier against the elements and make your boat last longer. Allow each layer of fiberglass to dry completely before applying the next.

6. Finishing Touches

Once the fiberglass has dried, sand the entire hull and deck smooth to ensure a professional finish. Caulk any gaps or seams to create a watertight seal. Apply your chosen paint color to the exterior, ensuring a protective coating. Finally, attach the paddles or install the electric motor according to the manufacturer's instructions.

Tips and Tricks

Here are a few extra tips and tricks to help you create the perfect duck boat:

  • For a smoother finish, use a marine-grade plywood that is already waterproof and sanded.
  • To prevent warping, use a waterproof sealant on all exposed wood surfaces.
  • If you plan to use an electric motor, ensure you choose one with sufficient power for your boat's size and weight.
  • Always wear a life jacket when using your duck boat, regardless of your skill level.
  • Be respectful of the environment and dispose of waste properly.

Conclusion

Building your own homemade duck boat is a rewarding project that will give you a sense of pride and accomplishment. It provides a unique way to connect with nature and enjoy the outdoors. By following these steps and paying close attention to detail, you can create a functional and stylish vessel that you'll cherish for years to come. Embrace the challenge, enjoy the process, and get ready for endless adventures on the water.

DIY Wooden Boat Building: A Beginner's Tutorial

DIY Wooden Boat Building: A Beginner's Tutorial

DIY Wooden Boat Building: A Beginner's Tutorial

The allure of building a wooden boat is undeniable. From the satisfying scent of fresh wood to the rewarding feeling of watching your creation take shape, the process is an immersive and fulfilling journey. This tutorial provides a comprehensive guide for beginners, simplifying the process and guiding you through each step.

Choosing Your Boat Design

The first step is selecting your boat design. Consider your skill level, available resources, and intended use. Simple designs, like rowing dinghies or small sailboats, are ideal for beginners. You can find free plans online or purchase them from reputable sources.

Types of Boat Designs:

Explore options like:

  • Dinghies: Lightweight and easy to row, perfect for recreational use.
  • Sailboats: Offer a more challenging build but provide the thrill of sailing.
  • Kayaks: Compact and maneuverable, suitable for exploring waterways.

Gathering Materials

Once you have your design, gather the necessary materials. This includes:

  • Wood: Select high-quality marine plywood or hardwood suitable for boat construction.
  • Epoxy resin: A durable and waterproof adhesive for bonding wood and creating a strong hull.
  • Fiberglass cloth: Used to reinforce the hull and provide watertightness.
  • Hardware: Including screws, bolts, hinges, and other necessary components.
  • Tools: Ensure you have essential woodworking tools like saws, planes, chisels, and clamps.

The Building Process

The actual construction involves careful planning and precise execution. Here's a breakdown:

Step 1: Cutting and Shaping

Carefully cut the wood according to your design plans. Use a table saw or a circular saw for straight cuts, and a band saw or jigsaw for intricate shapes. Ensure all pieces fit perfectly before proceeding.

Step 2: Assembling the Hull

Start by building the keel, the backbone of your boat. Then, attach the frames (ribs) and planking (outer skin) to form the hull. Use epoxy resin to secure the joints and ensure watertightness.

Step 3: Applying Fiberglass

Once the hull is assembled, apply layers of fiberglass cloth soaked in resin to reinforce the structure. This will protect the wood from water damage and make the boat more durable.

Step 4: Finishing Touches

After the fiberglass has cured, you can finish the boat by sanding it smooth, applying paint, and adding any necessary hardware. This includes seats, oars, or a mast and sails depending on your design.

Tips for Success

Building a wooden boat takes time and patience. Here are some tips to ensure a successful project:

  • Plan meticulously: Study the plans carefully and understand every step before you begin.
  • Take your time: Rushing the process can lead to mistakes.
  • Be precise: Accurate measurements and careful cuts are crucial.
  • Seek advice: Don't hesitate to ask for help from experienced boat builders or join online forums for support.

Enjoying Your Creation

The culmination of your efforts is a handcrafted wooden boat ready to take to the water. As you enjoy the fruits of your labor, remember the dedication and skill invested in its creation. Each time you launch your boat, it will become a testament to your craftsmanship and a source of immense satisfaction.